Webcaptioner Walkthrough
The Basics
Before we start, go to https://www.webcaptioner.com
You will need to open this page in a Chrome browser.
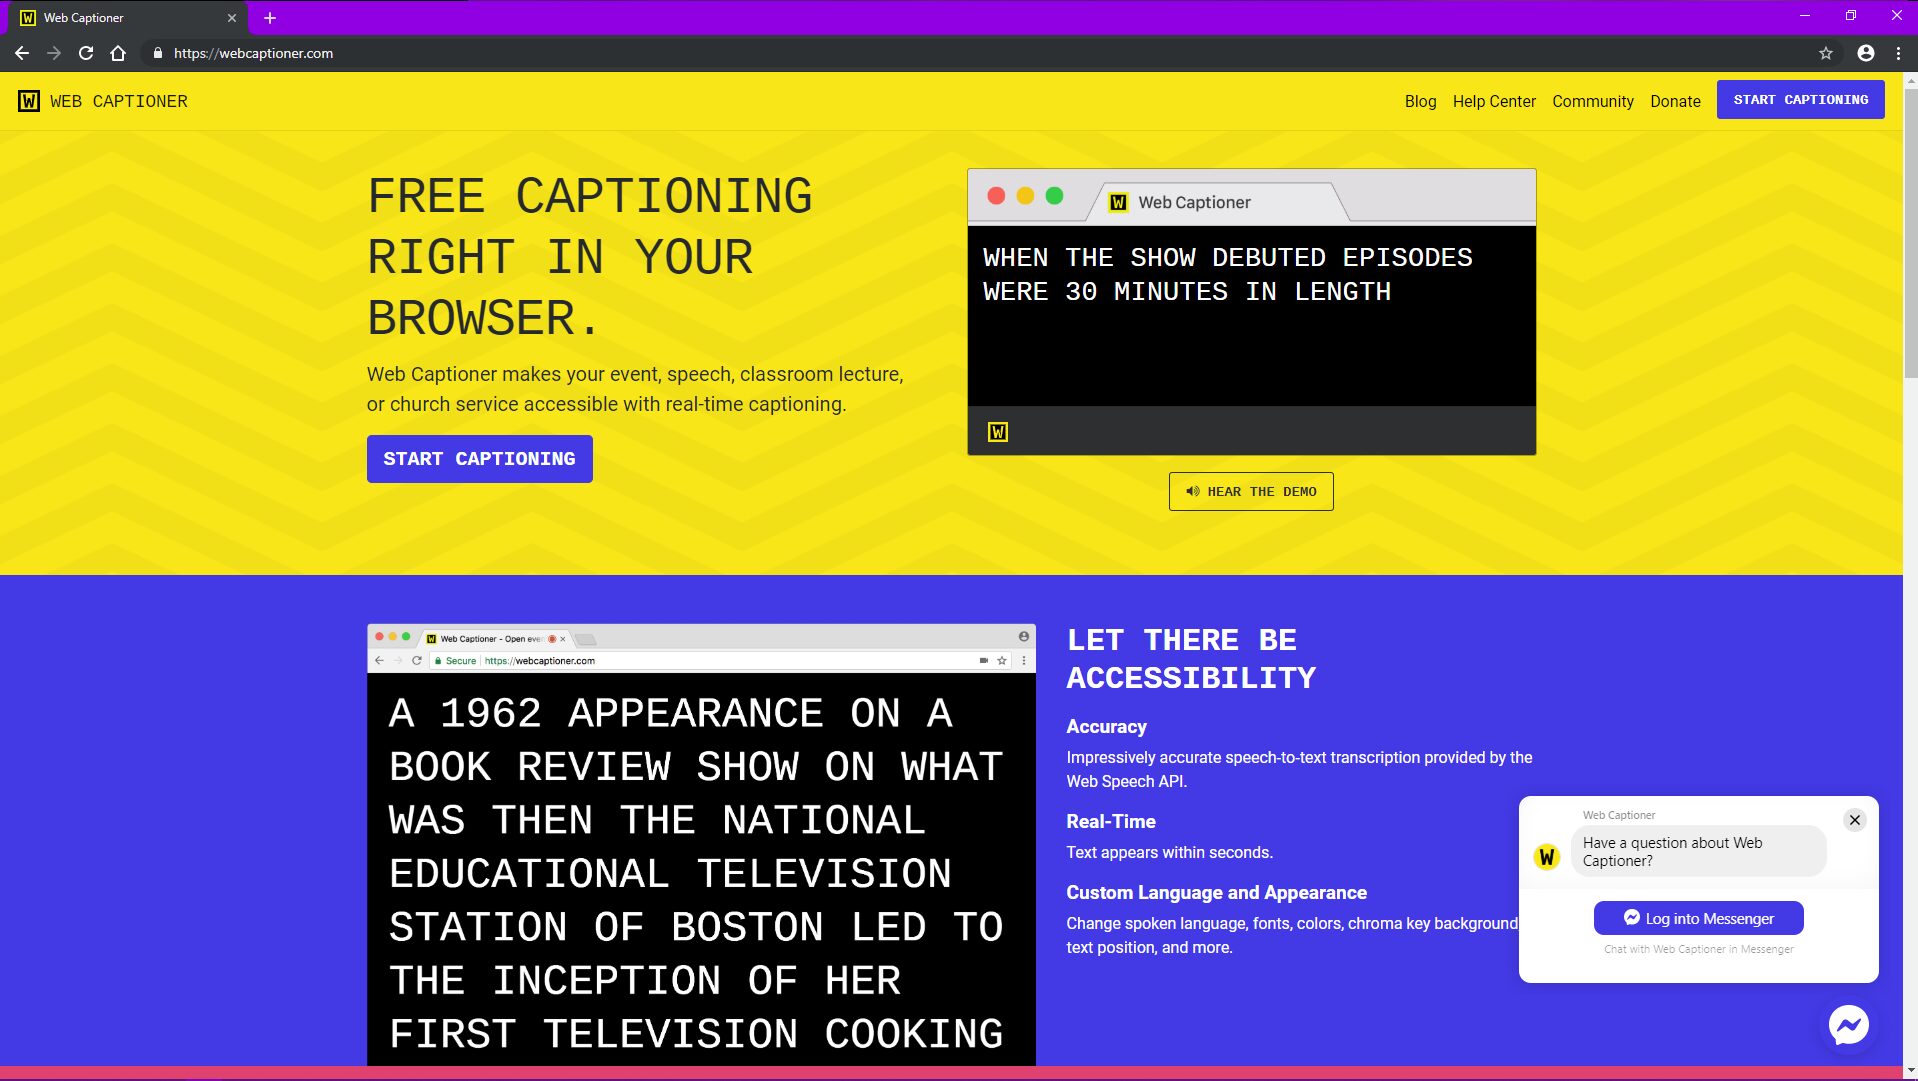
This is what you will see when you first load up the page. To start setup, click either of the blue ‘Start Captioning’ buttons.
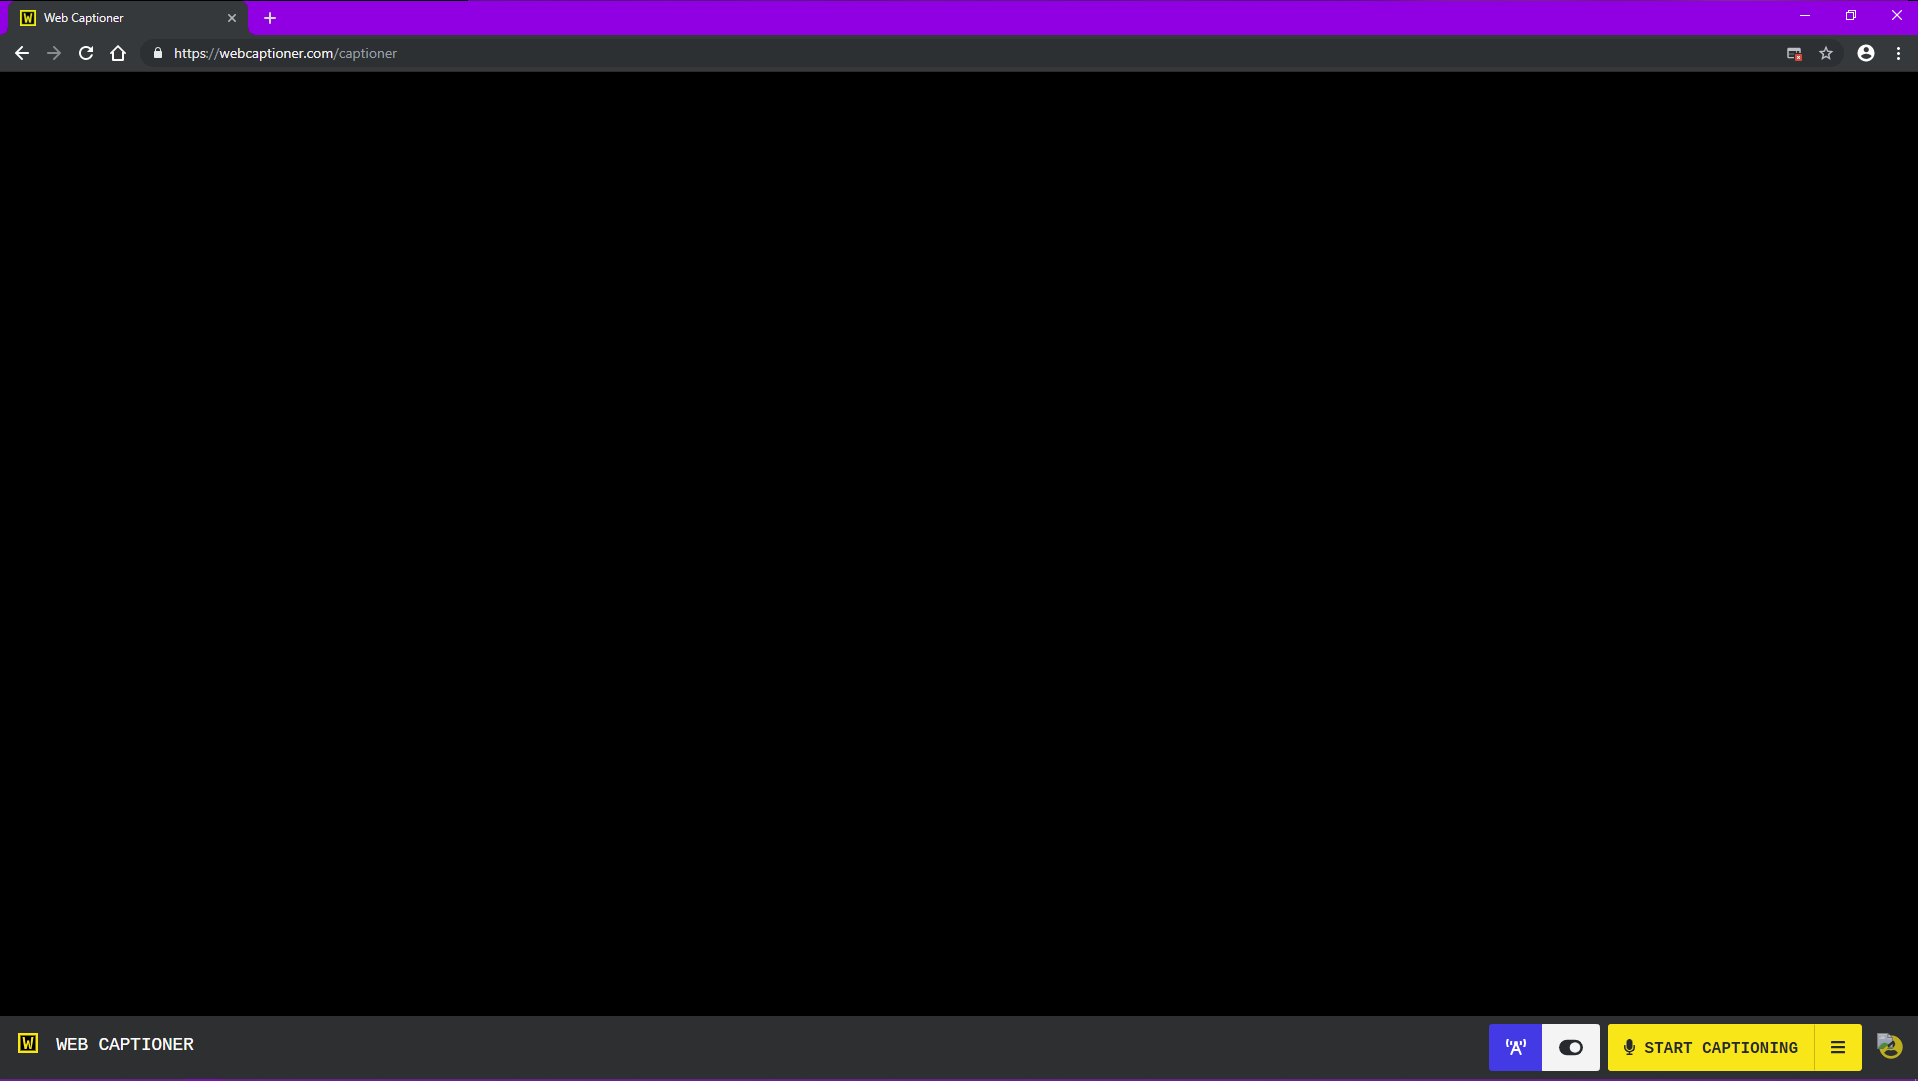
This is the next page you will see. It’s empty now, but after you start, it will fill up pretty quickly. For now, click the Menu Icon on the navigation bar. It is at the bottom of the page.
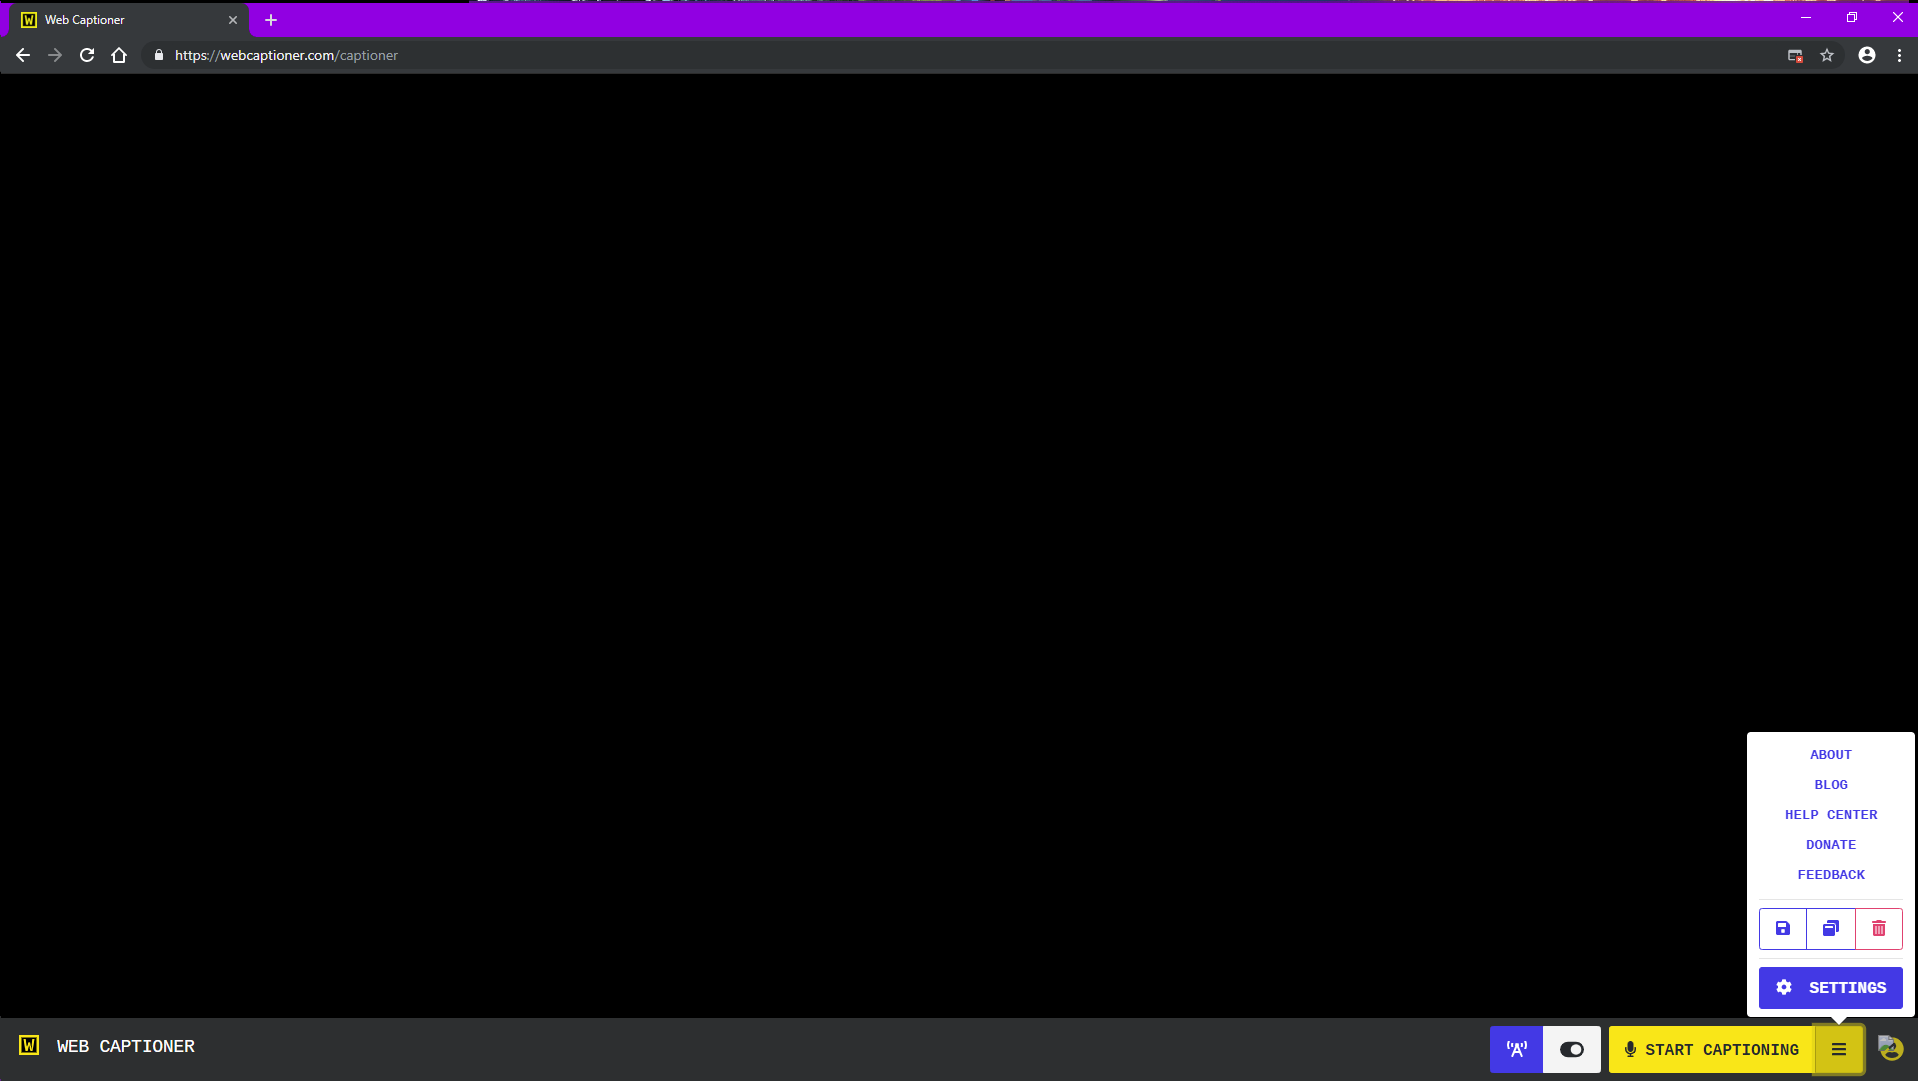
This is your menu. Clicking the Red Trash Can button will erase your current transcript. Clicking the Floppy Disk Icon will save your transcript to Dropbox if you have it connected (more on that later. The middle button, with the copy icon, will copy your entire transcript for you to load into another application.
You may notice a blue button with a toggle switch to the right of the yellow start captioning button. If you don’t, don’t worry- I’ll show you how to enable that feature- this is the feature you need to use captioning if you are sharing it with others.
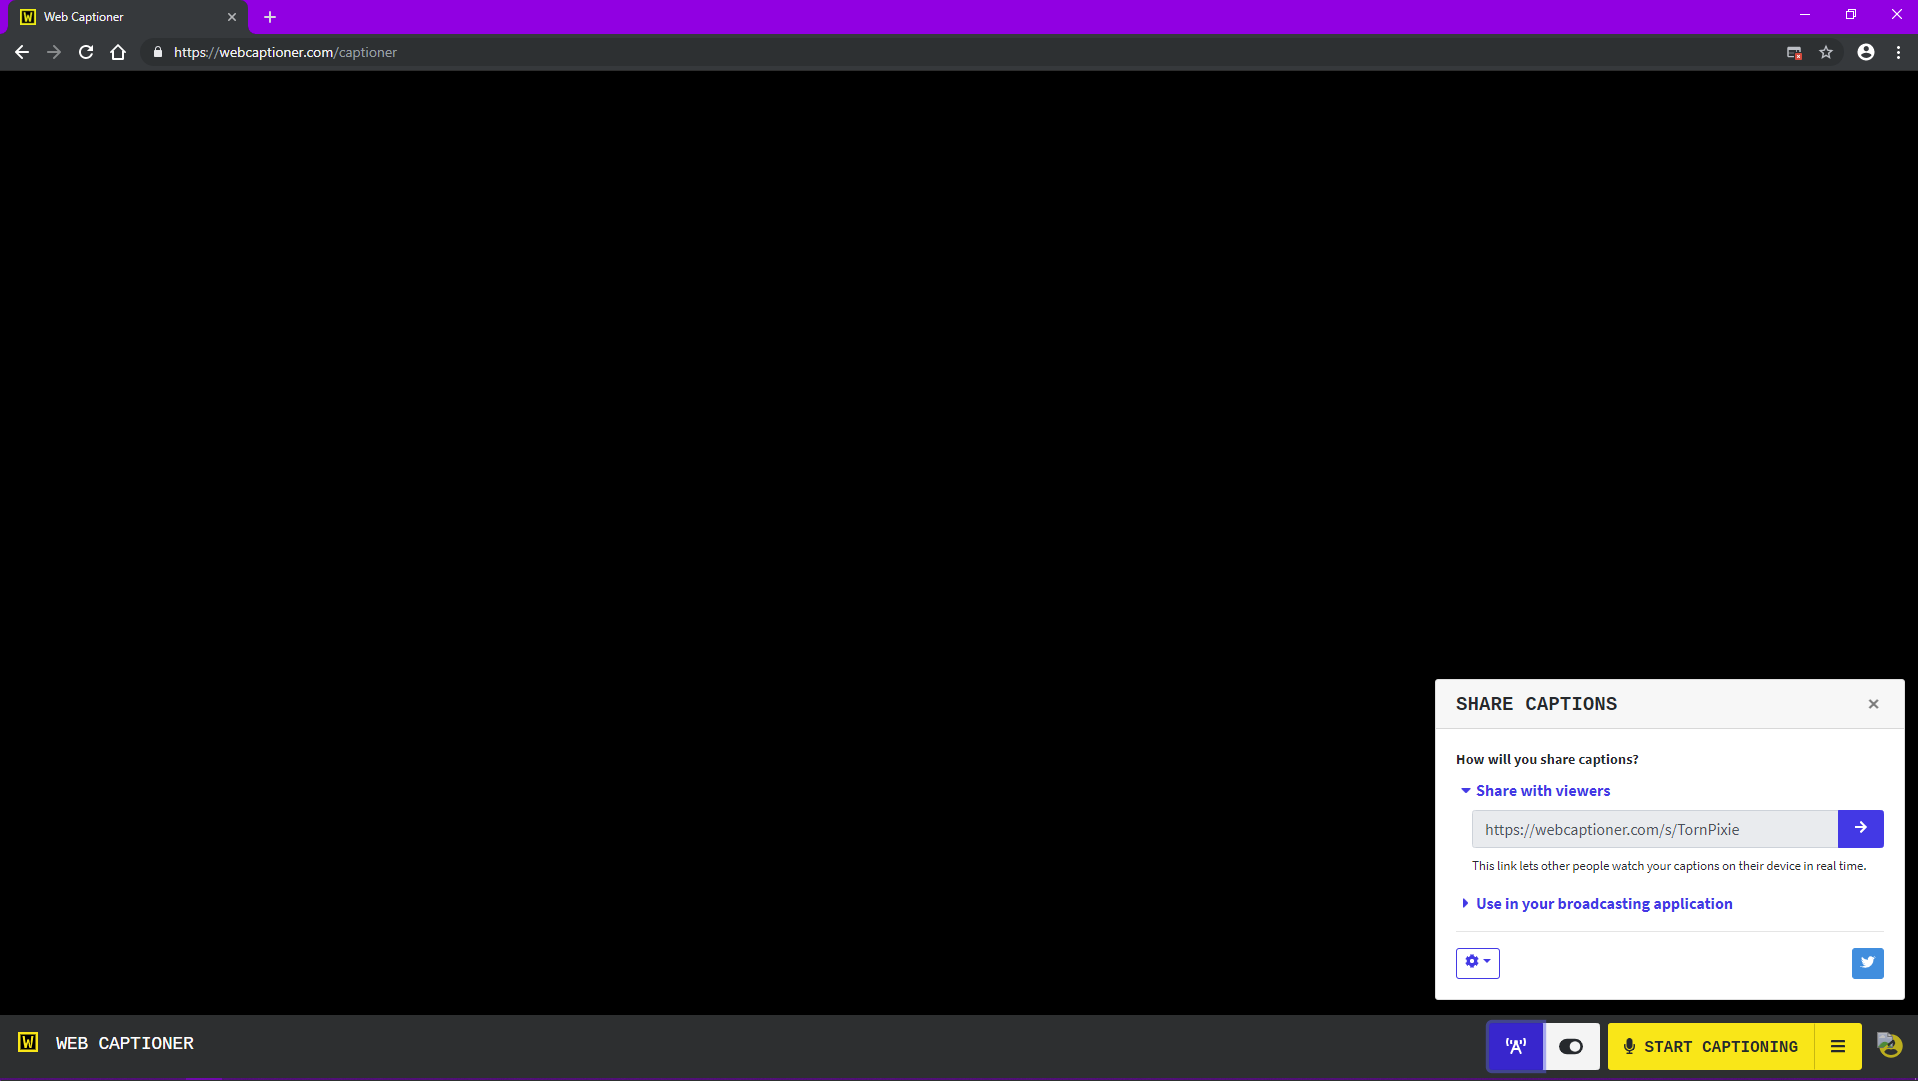
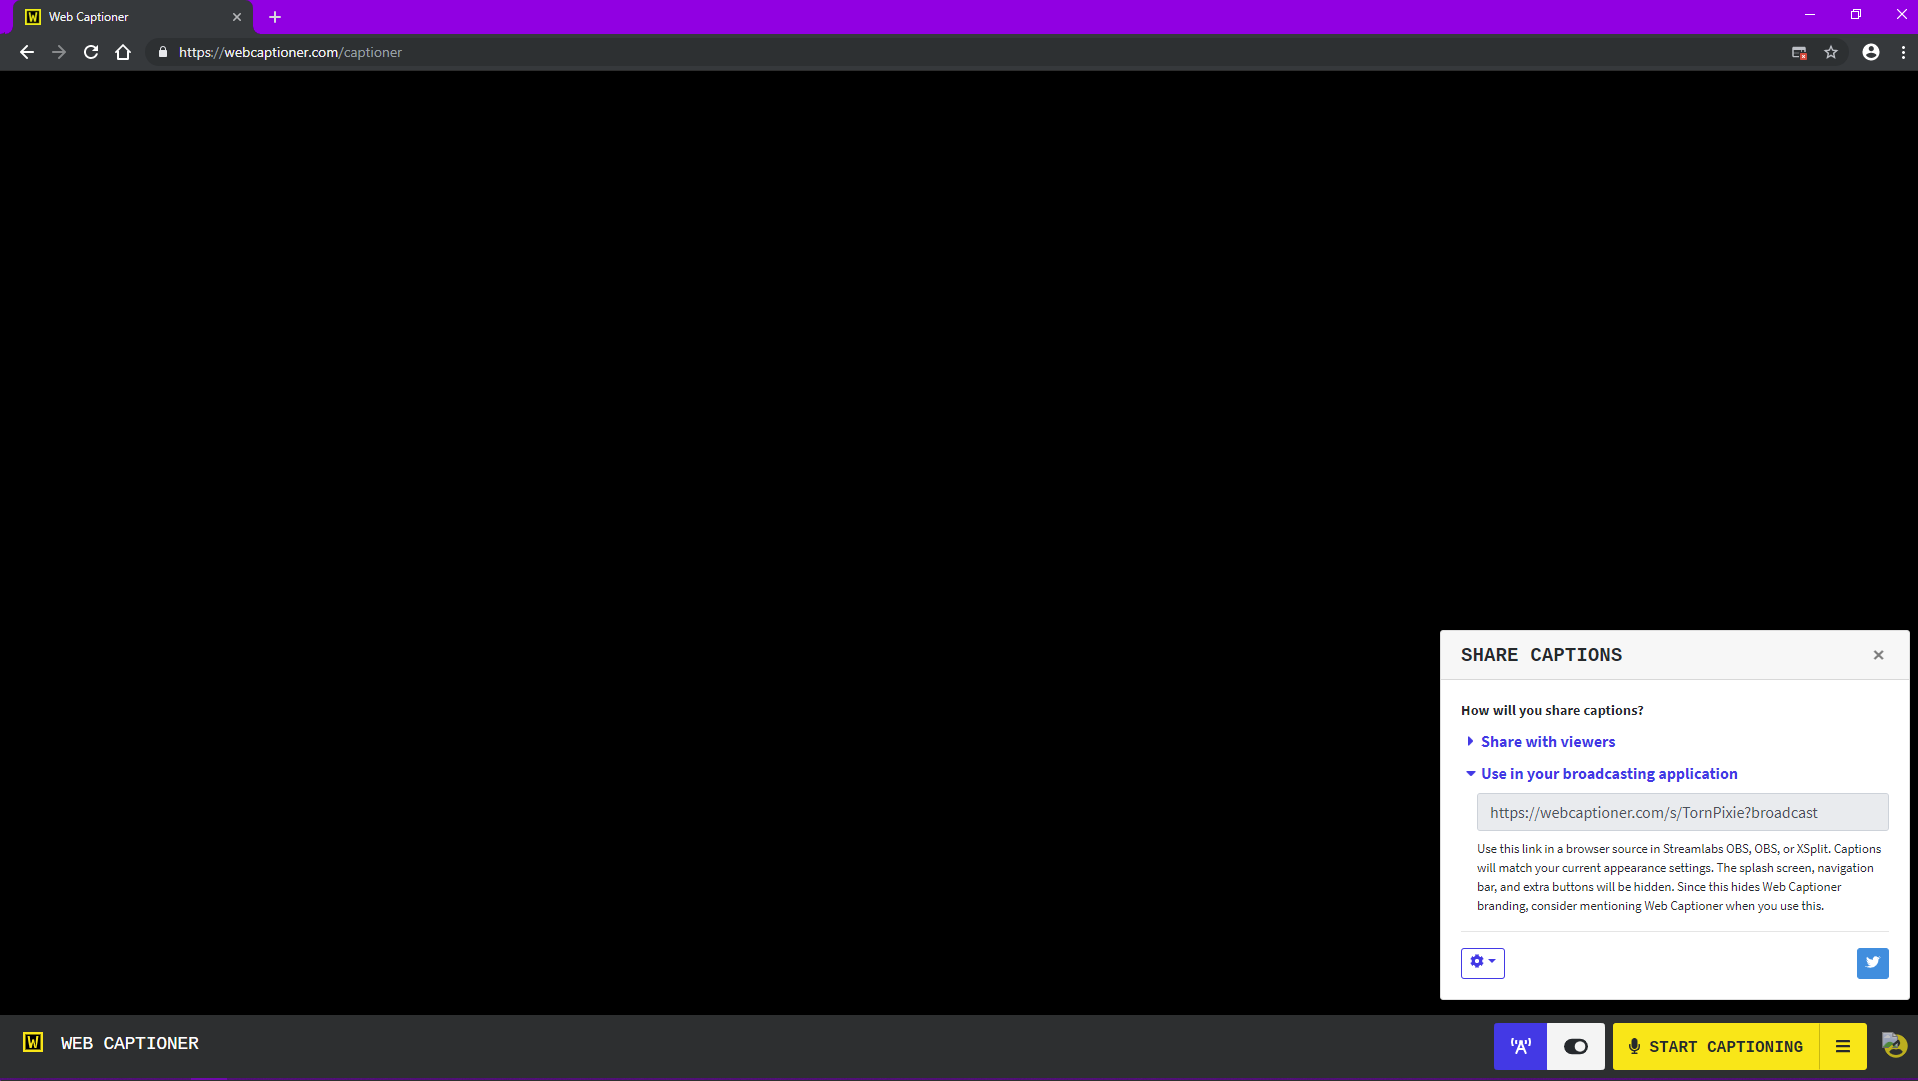
Once you have the ability to share your captions, this is what the share menu looks like. If you are broadcasting and want multiple outputs, you will need each individual you are captioning to setup captioning on their end, and send you their broadcasting link for you to use in your recording software (I use OBS Studio). I have a separate document on setting up captures for captions when recording.
Settings

This is the general settings page. Changing these setting affect not only how the captions show up in your broadcasting software, but also how they will initially appear on the viewer link. Here you basic captions behavior, as well as a list of hotkey information.

In order to have access to the viewer share link and the broadcasting link, you will need to navigate to experiments. Write in share in the box, then click add. Refresh the page, and that blue box with the toggle should be there.

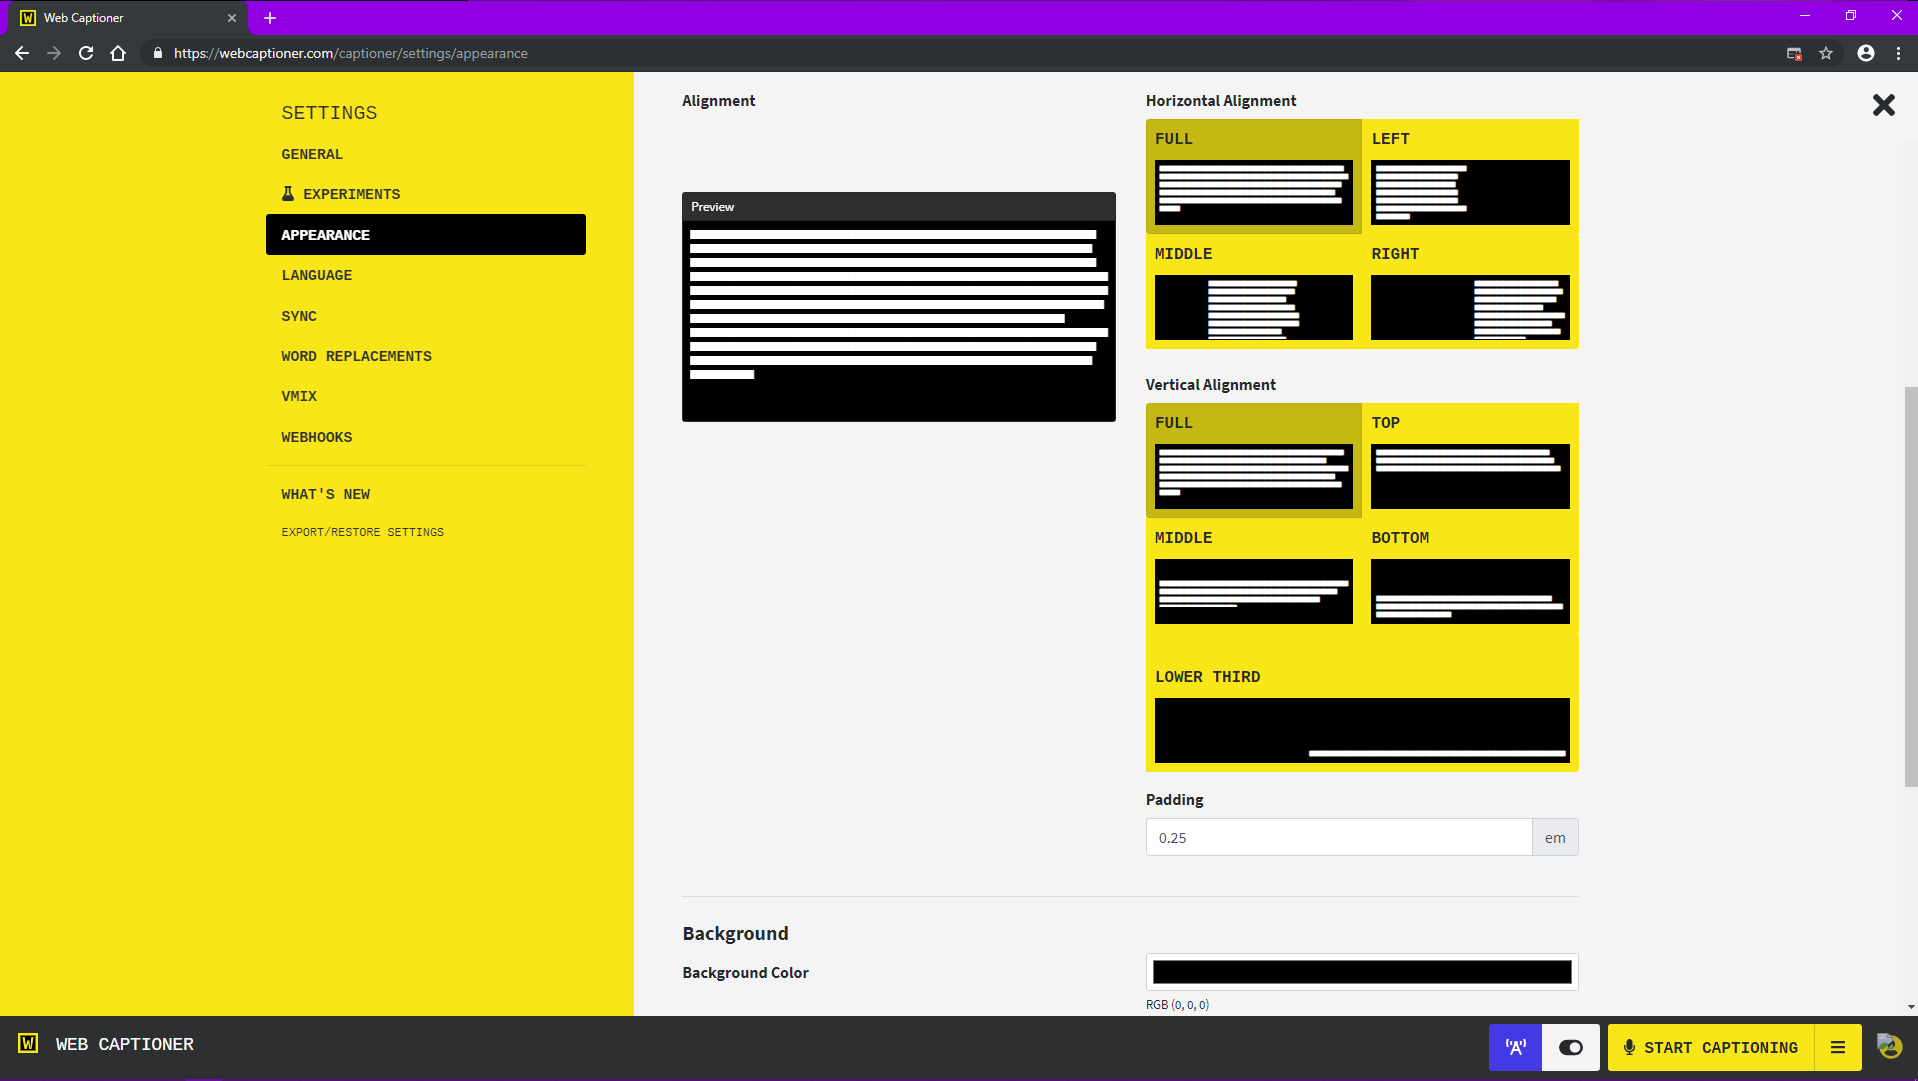

Appearance is where you can change the font, font size, capitalization options, color, interim color (useful for indicating who is currently speaking when you have multiple sources in your broadcasting software, like for captioned visual podcasts.), and background color and opacity.

Finally, we have languages. Selecting the correct dialect is important and will help improve the accuracy of your captioning settings.
Troubleshooting
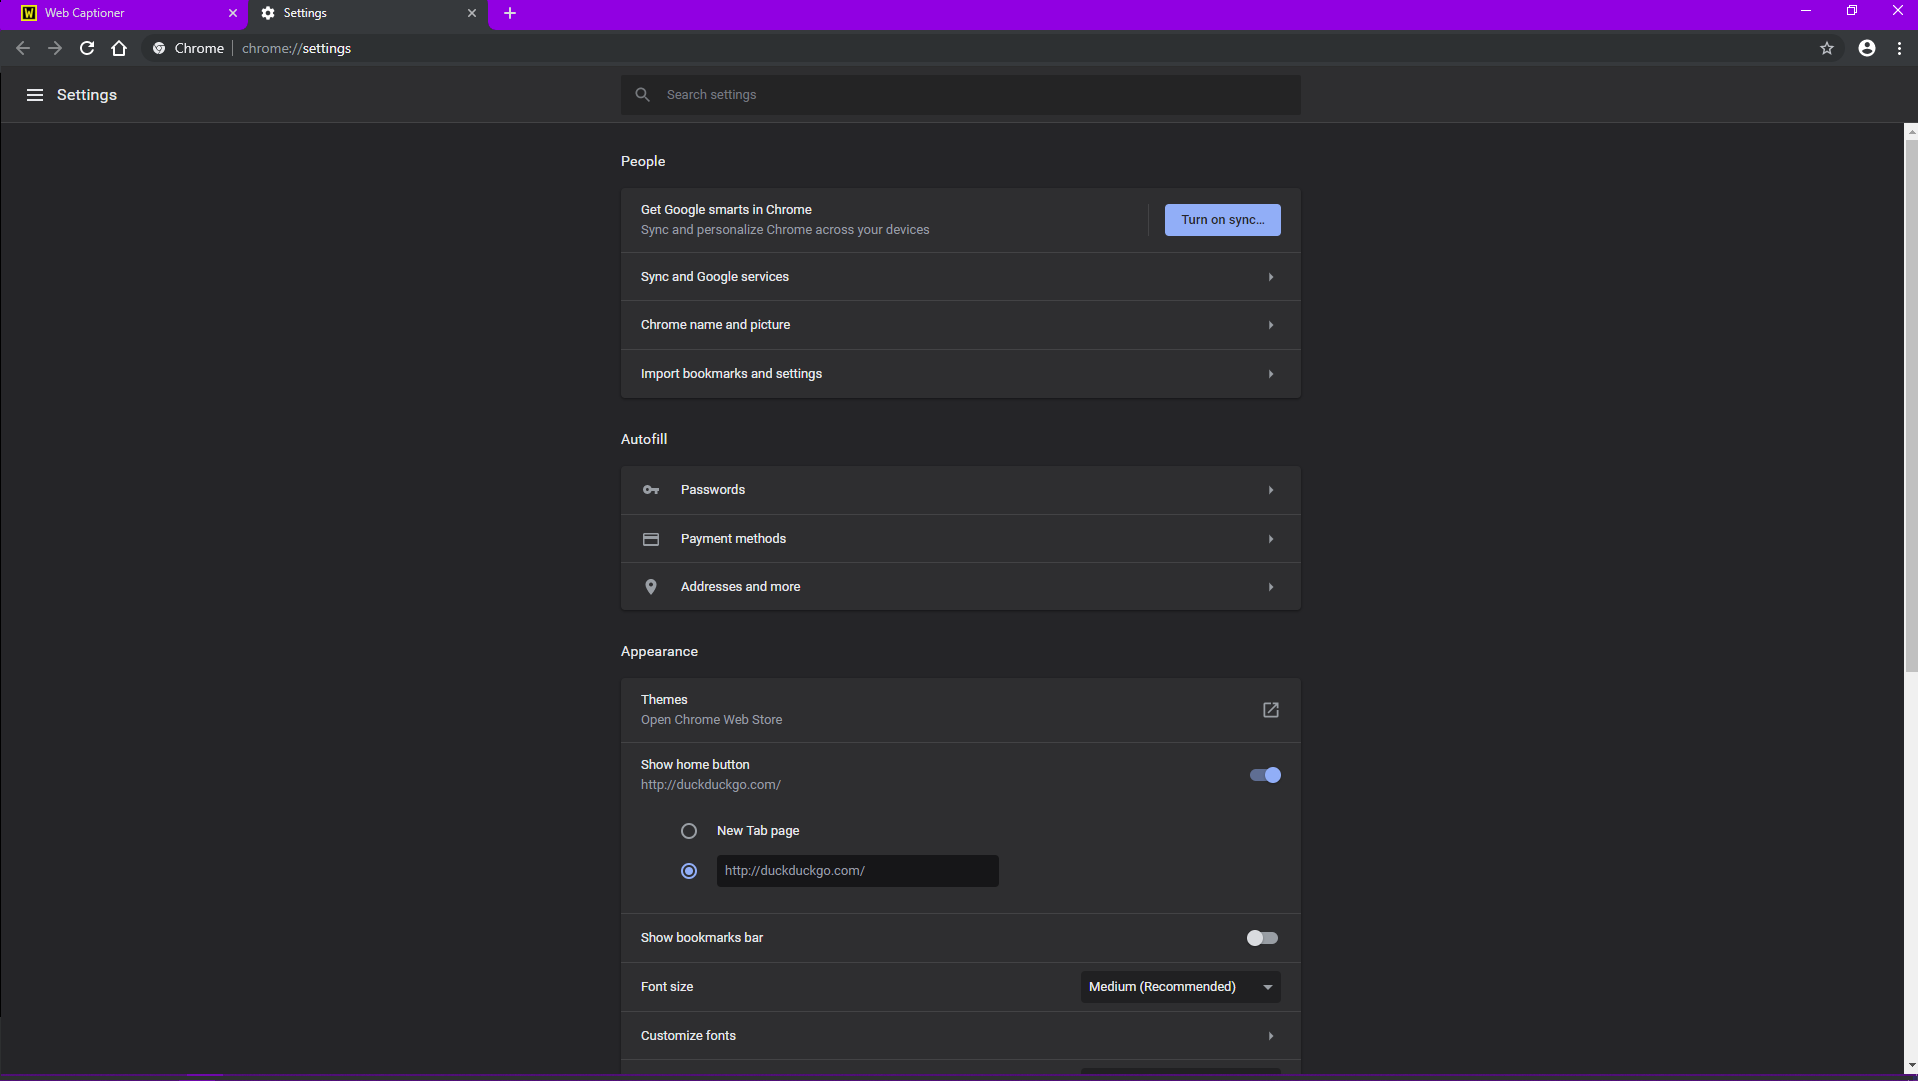
You’ve got everything set, but it’s not recording what you’re saying. The number one issue when this happens is that either the website is blocked from accessing the microphone, or you have the wrong microphone enabled. Navigate to settings in your chrome browser. Should be a dropdown menu on the upper right of your window.

These are the base settings you can set up. You’ll need to scroll down to access the Advanced Settings.

Once you have opened the Advanced Settings, navigate to Site Settings.

Now, navigate to Microphone. This should open the dialog for your microphone.
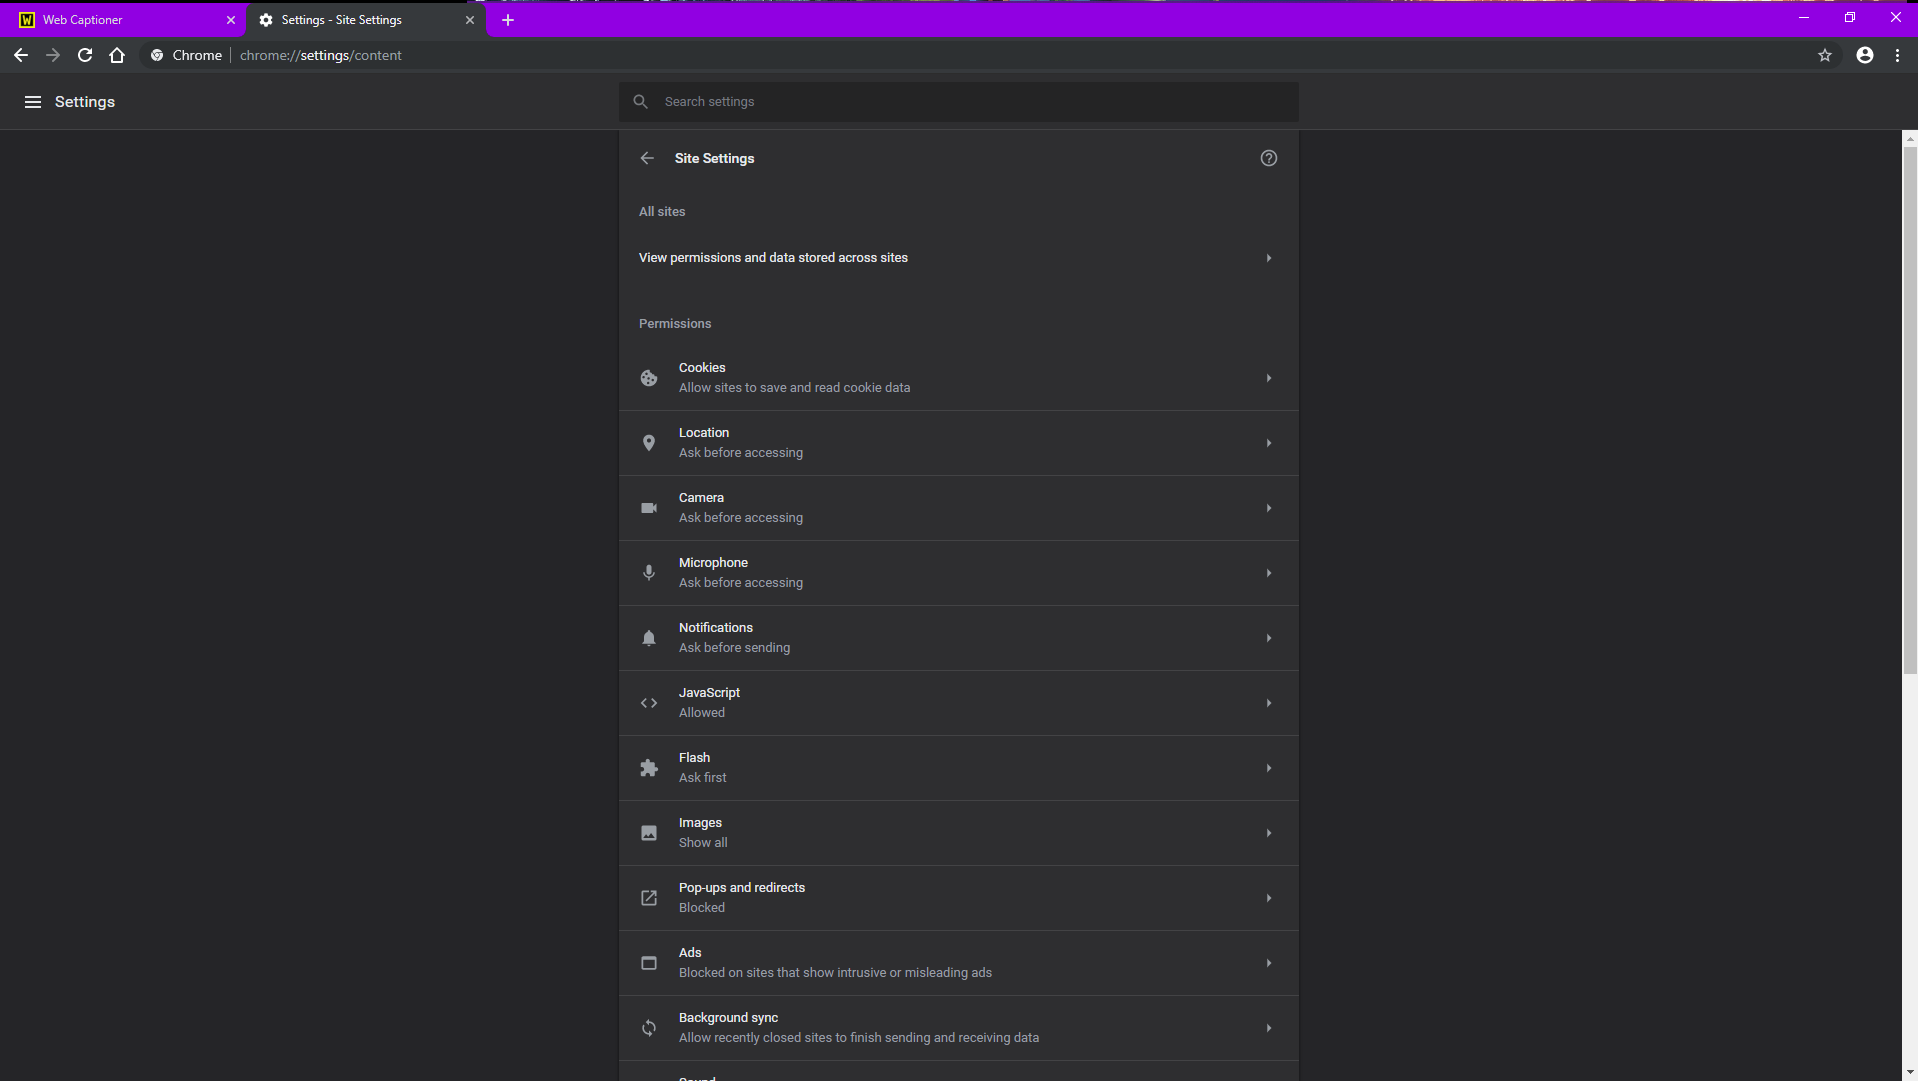
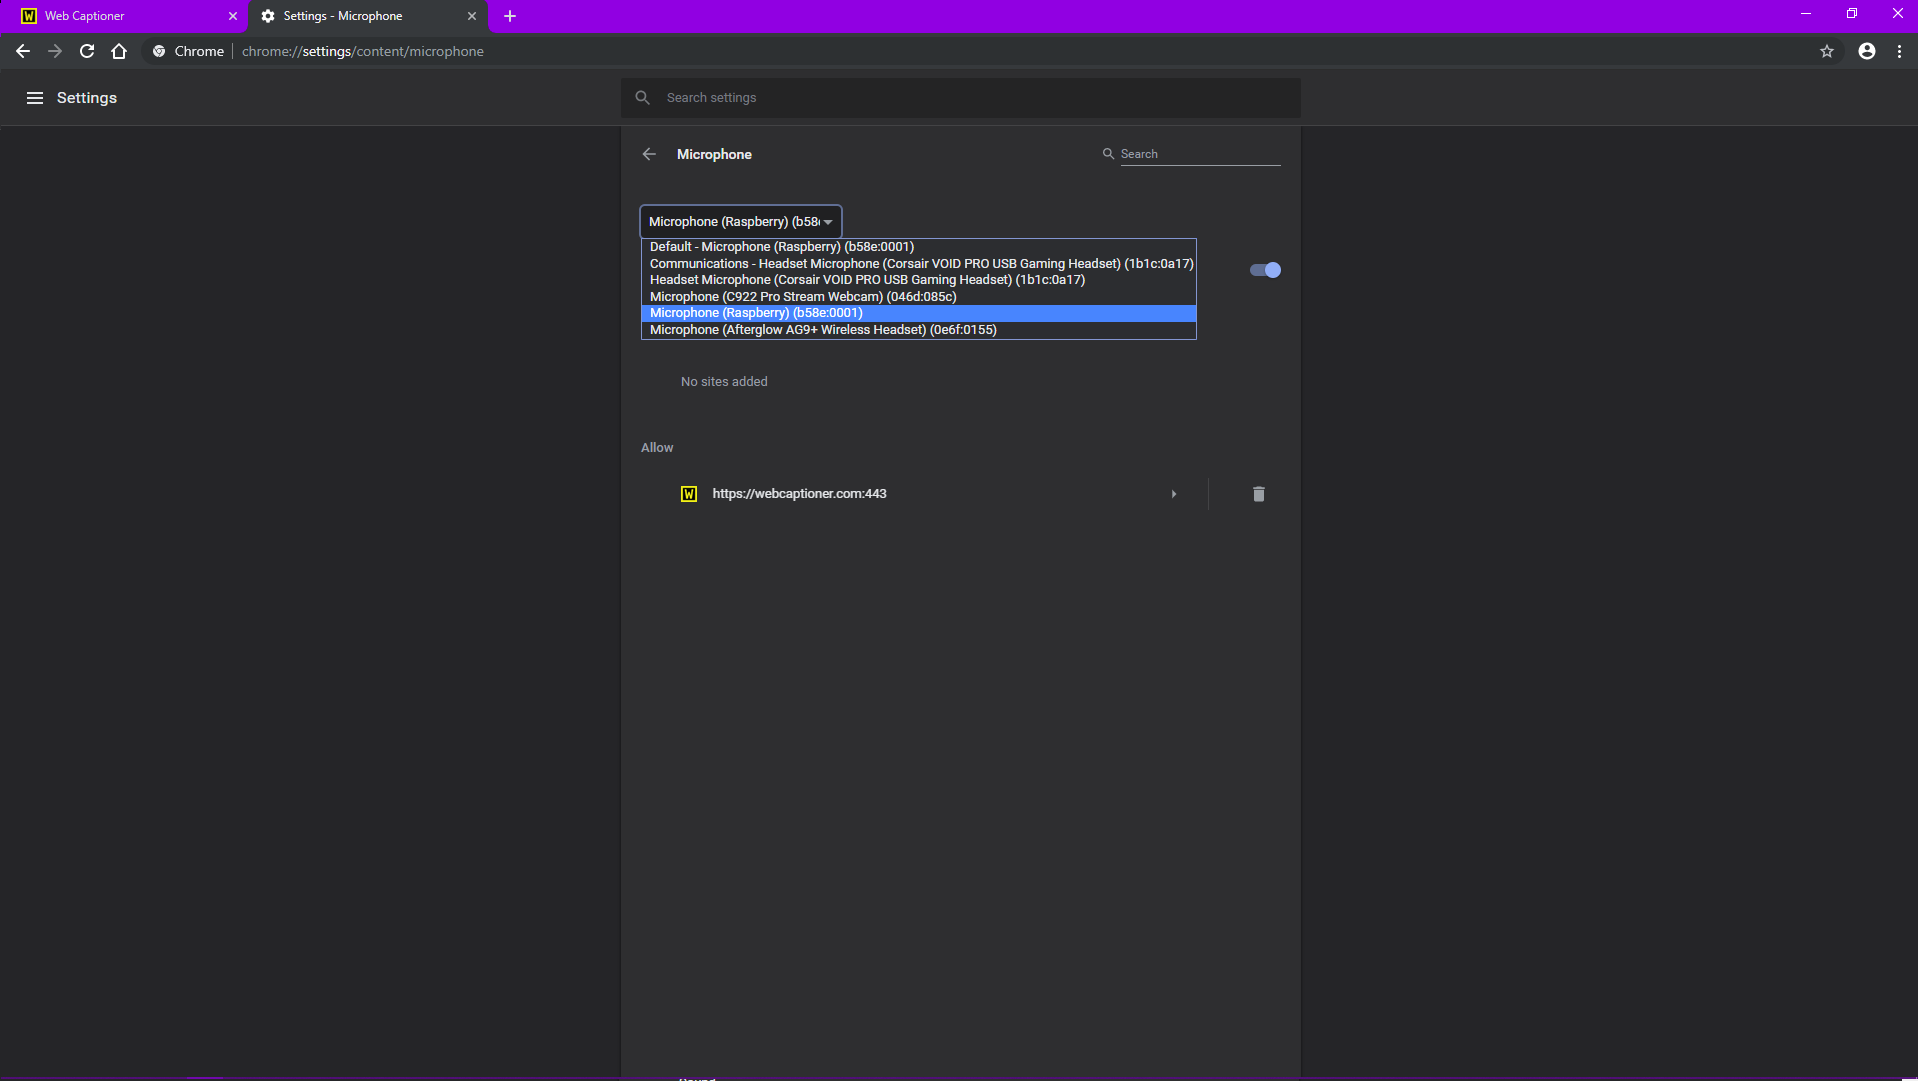
Make sure you have the correct microphone selected. If not, you can change it to the correct one too. Additionally, you can check the allowed site list to see if Webcaptioner has been allowed.
You’re All Set!
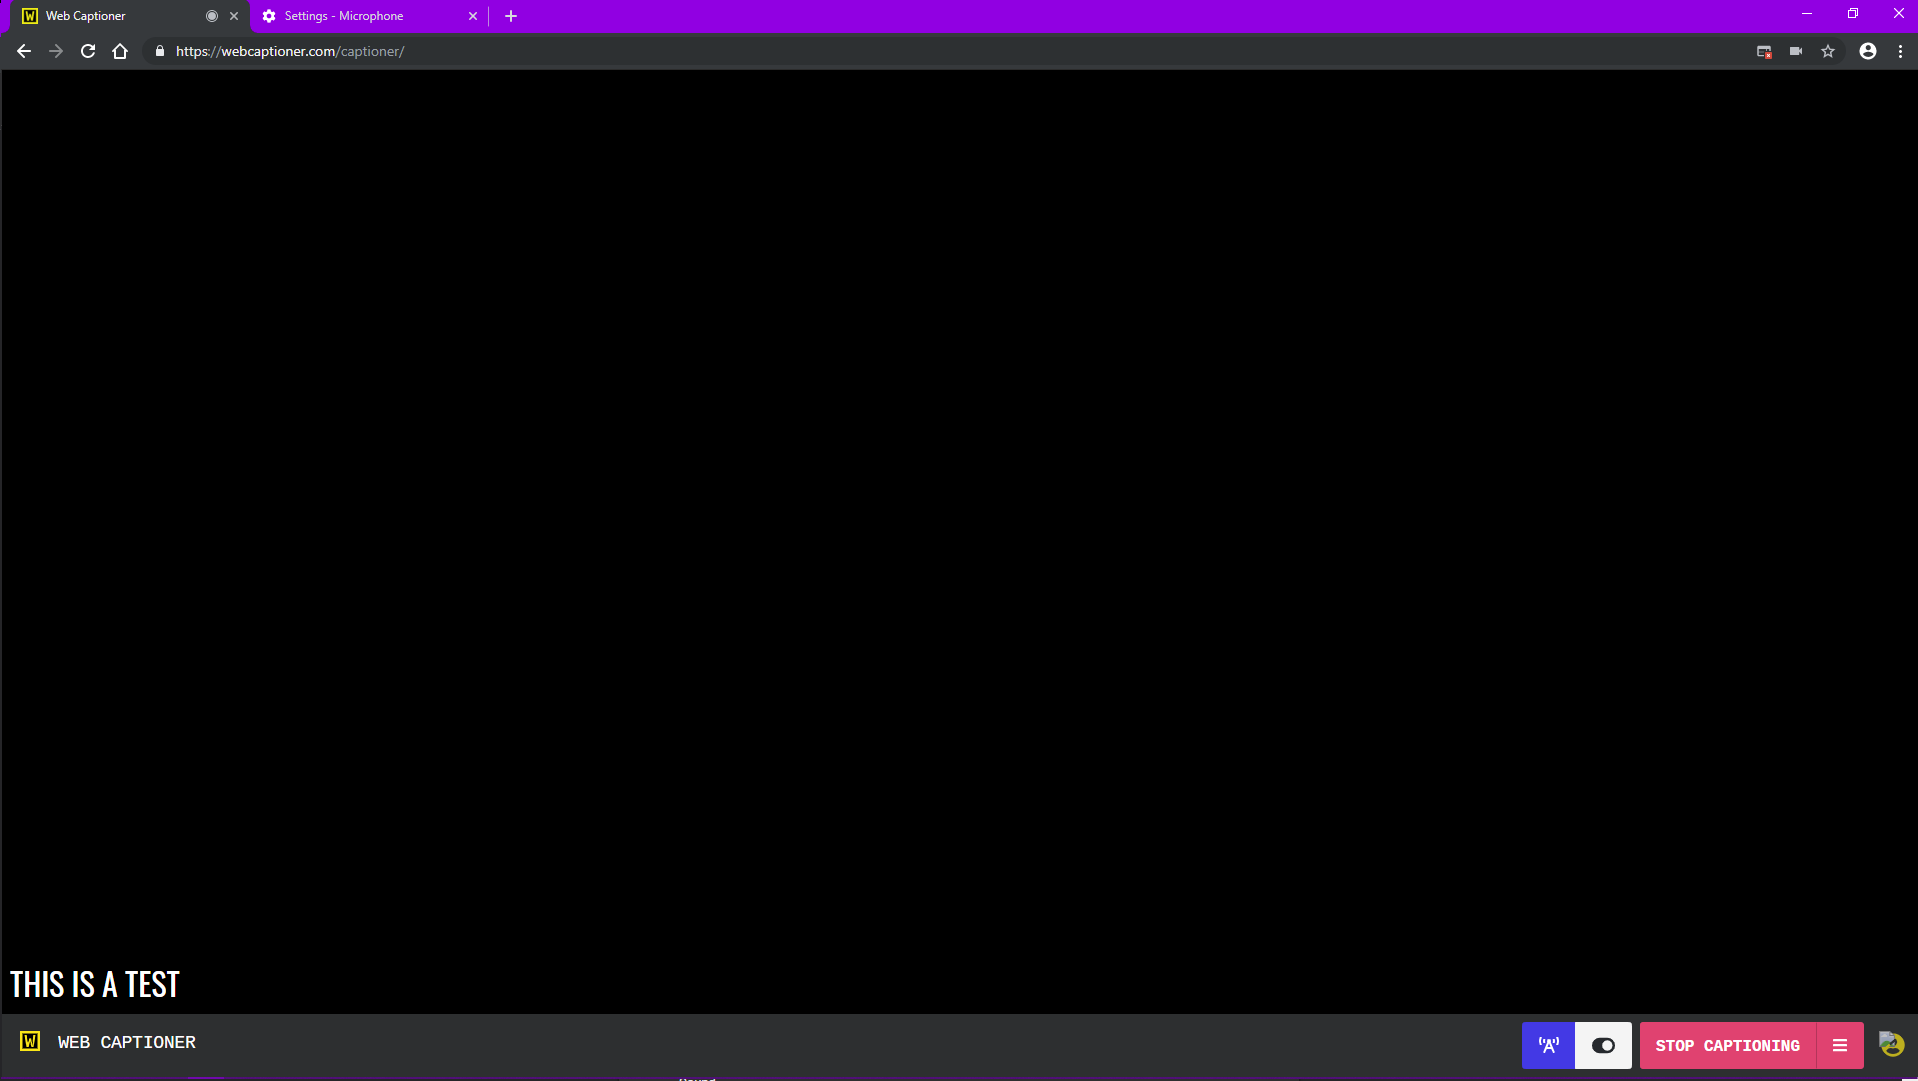
Exit out of settings, and click the yellow ‘Start Captioning’. Webcaptioner should now be transcribing everything you say.
A couple tips to help improve the quality of Transcriptions:
Make sure your mic is close to your mouth- 3 to six inches. Further away, and room acoustics will contribute to echo that will confuse the transcription.
Speak slowly and clearly. The faster you talk, the more errors webcaptioner will have.
Webcaptioner can punctuate, but only if you name the punctuation. This is best for if you plan on either editing the audio, or simply using cpationer to handle transcribing that you will save for later.